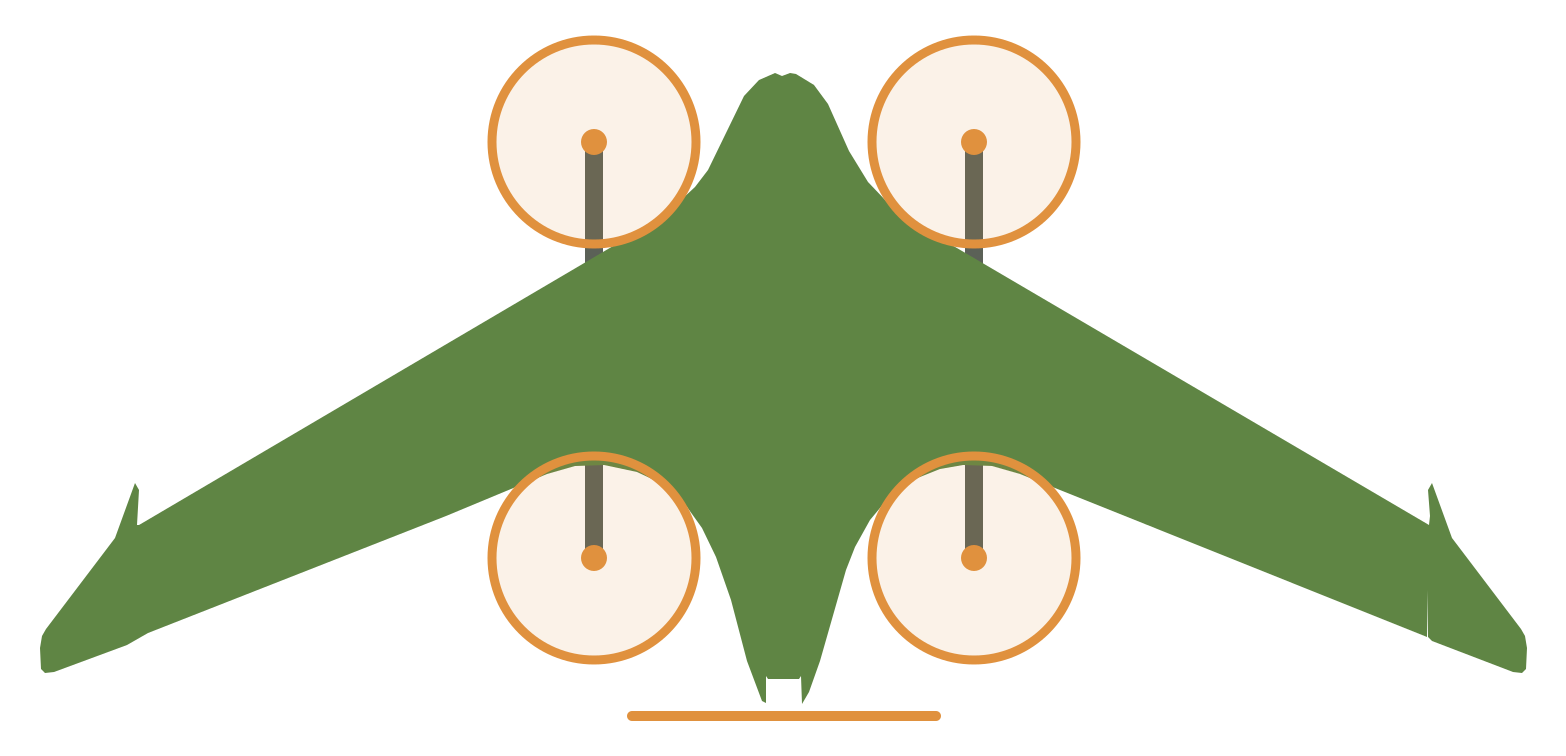
Fly the First Flights
This card is the procedure for the first flights of the real aircraft. It has the bench checks, the failsafe checks, the first hover and the first transition. It ends with the control doublets that set the feed-forward gains. The stall test (stall-test.md) comes after this card.
The lift ESC on the first flights is the TBS Lucid 60A 3-8S AM32 4-in-1 (Ryan, 2026-09-29 and
2026-10-04; parts-list row 2b). The
DroneCAN pod ESCs come later, with their own bench items. The avionics items are from
th-avionics, with the values in params/ at commit 84c927f and the 4-in-1 overlay at c4edd06. The
doublet sizes and the expected rates come from the SITL and JSBSim comparison of 2026-09-29
(sim/scripts/h5_doublet.lua, flights H5). All SITL values are estimates.
The feed-forward gains are RLL_RATE_FF 0.311 and PTCH_RATE_FF 0.801. They assume the
control authority from the CFD: Clda 0.207, the up-side elevon slope (th-aeronautics 1bcc0b1).
The VSPAERO model gives 0.273, which is 32% more.
The doublets in this card measure which one the aircraft has. Do not fly a banked survey turn
before the doublets.
Before power-up
Section titled “Before power-up”CAUTION: Do not fly until the scripting memory check passes on the real LUX F765 (electronics-notes.md, th-avionics 5dd5990d). The board’s default script memory is 100 KB. That is too small for the eight first-flight scripts. In SITL, three of them did not load and the aircraft did not arm (2026-10-14).
On Ryan’s LUX the check passed on 2026-10-15 for the day build and the night build. These rows
in params/board-luxf765.parm make it pass: SCR_HEAP_SIZE 225000, LOG_FILE_BUFSIZE 16 and
TERRAIN_ENABLE 0. At the defaults the board memory was too small and EKF3 did not get its
memory (th-avionics 6882a51a, e29b65c9). Do not turn terrain on, and do not change the log buffer
or the script memory, without the check.
Do the memory check again before the first arming, with the SD card of the flight build. Do it
again after a change to the flight scripts. If the check fails, do not change SCR_HEAP_SIZE.
Tell th-avionics.
The checklist codes. th_prearm.lua refuses arming until the hard checklists of this card hold
their codes (th-avionics 9327c7a1).
| Parameter | Checklist |
|---|---|
TH_CLR_1 |
Before power-up |
TH_CLR_2 |
Bench checks, propellers off |
TH_CLR_3 |
Failsafe checks |
TH_CLR_4 |
The night build |
When a checklist is complete, get its code. Download the parameters from the aircraft to a file with one NAME,VALUE line each, or as a QGroundControl .params file. Then run this command:
uv run --no-project python tools/checklist_code.py codes --values <that file>The tool writes one line for each checklist. Each line has the parameter name, a decimal number and the code as 6 hex digits. Set the parameter to the decimal number.
If you change a gated parameter, the code no longer matches and the aircraft does not arm. Clear
the checklist again. TH_CLR_OVR 1 lets one arming through. The GCS then shows “thprearm: armed,
gate OVERRIDDEN (TH_CLR_OVR)”. The log records it (THCG). The value goes back to 0 at disarm.
- Prepare the microSD card, then load the parameter files. Do these in this order:
- Fit a microSD card before you flash the board. The Lumenier LUX F765 NDAA does not boot ArduPilot without one.
- Copy
params/sdcard/message-intervals-chan1.txtto the root of the card, not toAPM/orAPM/scripts. Do not edit it: a comment line in it stops the heartbeat on that link. It sends the landed state to the dock’s node on the LoRa link. Without the dock, it has no effect (th-avionics 2f0daa8). - Copy eight scripts from
sim/scripts/toAPM/scriptson the card. Copy no others. The eight arecg_slider.lua,lift_check.lua,th_prearm.lua,gps_loss_guard.lua,tip_guard.lua,arspd_stuck_guard.lua,arspd_orbit.luaandaxis_approach_brake.lua(th-avionics 9327c7a1; this set flew in SITL as one). - Copy
params/sdcard/th-clr-list.txtto the root of the card, next to the message-interval file, not toAPM/orAPM/scripts. Without it the aircraft does not arm: “thprearm: no th-clr-list.txt, arming refused”. - Boot the board once before you load the parameter files:
LCK_LANE_REQexists only afterlift_check.luahas run. - Load
params/terrahawk-common.parm. - Load
params/board-luxf765.parm(the first-flight board; Ryan, 2026-10-04, th-avionics 3c9f3f6). - Load
params/airframe.parm(one airframe; Ryan, 2026-10-04, 8d40d05).TH_AIRFRAME1 is the pre-arm proof that it was loaded. - If the “Payload Cover (TFmini-S)” is fitted, load
params/payload-tfmini.parmafter the airframe file and reboot. It setsRNGFND1_TYPE(th-avionics 635b2a3). Without that cover, do not load it: the board file clears any leftover rangefinder, and the payload file with the cover off fails the pre-arm “no data” check, which is the intended guard. - Do each file in two passes. Then do the
--loadedcheck. - Use USB on the bench for the loading and the check. The parameter download over the LoRa
telemetry link is slower than over the SiK was (
params/README.md). - Do not load
params/lift-4in1.parm: it is for the Pixhawk 6C Mini’s IO co-processor, and the LUX file carries the 4-in-1 settings itself. - Do not load
sim/terrahawk.parm.
- Run
tools/check_params.py. Make sure that it reports 0 findings. - Fit the flight pack. Measure the CG. Write it in the header of
params/airframe.parm. The pack rides the CG slider (Ryan, 2026-10-06;sim/scripts/cg_slider.luaon output 12, th-avionics). With the pack where the balance put it, setCGS_SET1: the script stores that place as TAKEOFF and says “cgslider: TAKEOFF set at … deg”. If it says “no sensor reading”, do not fly; the position sensor is not talking. Then setCGS_TKOFF_CGto the CG in mm as the balance shows it at that moment: write the balance’s reading, never a planned or remembered value, and do not enter 268 unless the balance shows 268 (th-aeronautics, th-avionics). The script caps the cruise move at 3 times (270 minus that CG), rounded down, so a slider that faults and holds at CRUISE never leaves the CG aft of the 270 mm limit (v1.6, th-avionics 6f61e02; th-aeronautics). WithCGS_TKOFF_CGunset, or outside 255 to 270, the script makes no cruise move at all. Then setCGS_AFT_MMto the travel left aft of TAKEOFF: 90 minus the pack front at TAKEOFF, so 16 at the forward stop (on Fuselage C the slider runs from a pack front of Y 74 to Y 90, cg.md). Set it on every flight: the script limits every move to 1 mm less than it and reads a position more than 2 mm past it as a fault, so with its default of 9 a TAKEOFF aft of a pack front of about Y 82 lets a cruise target pass the real travel (th-avionics). For a flight that releases a payload, one more number from the balance (v1.7, th-avionics f7154f1):CGS_DROP_CG, the CG read with the payload taken out and the pack at TAKEOFF. After the release the slider moves aft to the place that puts the CG back at the takeoff CG and holds it through the landing; the pre-arm text then names the offset from BASE, not TAKEOFF. A new balance (CGS_SET1) clears it. - If the CG is aft of 270 mm, do not fly. The band is 267 to 270 mm, aim 268 mm: its forward
edge is the CG that the stall test flies (Ryan, 2026-10-19; cg.md). Fly the first flights with
CGS_ENABLE1 andCGS_CRUISE_MM0: the slider holds the pack at TAKEOFF, its slip and jam checks run, and arming is refused if the pack has moved (“CG slider … mm off TAKEOFF (CGS_HOME)”: setCGS_HOME1 to drive it back, then arm). Do not fly withCGS_ENABLE0: a stopped continuous servo does not hold the pack (th-blender), so a hard landing or a knock would move the CG unnoticed.CGS_CRUISE_MMgoes to 8 only after the stall test and the pitch tune are done at the takeoff CG (th-avionics, 2026-10-06); the script then moves the smaller of that and its cap, about 6 mm at a 268 mm takeoff CG. The script also watches the two elevon servo supplies through the XIAO’s voltage lines (v1.9, th-avionics 4fbfa0e6). Each servo has its own Micro BEC, read at the BEC’s output pads. A1 reads BEC A (starboard), and the GCS shows it as SRVV. A2 reads BEC B (port), and the GCS shows it as SRVB. Each comes once a second. SRVB needs the XIAO sketch of terrahawk 12fc7d15; with the older sketch only SRVV comes. “cgslider: servo BEC A low … V” (the 1 s mean under 4.90 V) or “cgslider: servo BEC A lost … V” (under 4.0 V), or the same for BEC B, means land soon in a fixed-wing mode. The elevons are the only control on the wing, and one BEC fault stops one elevon. “cgslider: servo BEC A dip … V” (a 200 ms low under 4.65 V) during hard elevon work is a note for the log, not an abort. Each repeats at most every 5 s. - CAN is off on the LUX for first flights (
CAN_P1_DRIVER0): no bus to terminate, no DroneCAN airspeed, charge, rangefinder or servo node, and no dock charging. The board has one CAN port for later. The CAN steps return with the charge node, the Pixhawk 6C Mini or our own flight controller.
Fit the board on the Avionics Plate, USB-C and microSD edge forward. Then the card is reachable
through the front hatch. Use one soft stage only: the board’s own grommets (th-avionics
18e9975a). INS_POS1 in the board file is an
estimate from a photo and an estimated standoff height of 3 mm. On the Fuselage C v2.4B plate as
drawn, INS_POS1_Z is -0.0217 (th-blender W55, th-simulator 8d88360c). Measure the standoff height from the plate top to the PCB
underside: each millimetre more than 3 mm makes INS_POS1_Z 0.001 more negative, so correct it in
the board file
(electronics-notes.md, the LUX section).
CAUTION: Leave pin 1 of the HD VTX port unconnected. The video unit is the Walksnail Avatar HD Moonlight (Ryan, 2026-10-06): power it at 12 V from power hub A through the video switch (th-avionics 3678690; each elevon servo has its own Matek Micro BEC at 5.0 V, 1.5 A continuous, Ryan 2026-10-15), never from pin 1 (the board’s own 9 to 10 V) and never from the pack (25.2 V is the unit’s maximum). Connect only TX4, RX4 and GND to the port. Leave pin 6 (RX7) unconnected: it is the receiver’s line (th-avionics 69aa35a).
CAUTION: Before you plug the 4-in-1 into the ESC #1 port, check the cable’s pin order against the Lucid’s silkscreen, and measure that pin 1 is battery positive (1 VBAT, 2 GND, 3 current, 4 telemetry, 5 to 8 motors 1 to 4).
CAUTION: Before you connect the MS4525DO, measure the resistance from the sensor board’s SDA and SCL to its own 5 V pin. Pull-ups to 5 V there would drive 5 V into the F765’s I2C pins. Connect it only on a bus pulled up to 3.3 V. The GPS port is 1 5 V, 2 TX3, 3 RX3, 4 SCL, 5 SDA, 6 GND.
Bench checks, propellers off
Section titled “Bench checks, propellers off”CAUTION: Remove all propellers before the motor tests. A motor test with propellers fitted can cut a hand.
To arm for these checks, set TH_STAGE 1. Then only TH_CLR_1 must hold its code.
-
Switch the transmitter on. An RC source must be on to arm (
THR_FAILSAFE1). The ELRS receiver is on the receiver port, SERIAL7 (UART7,SERIAL7_PROTOCOL23, CRSF). Load the site mission. Its last item is an RTL. After the RTL come a JUMP_TAG 900 (LCK_LANE_TAG), the approach waypoints and a fixed-wing NAV_LAND on the keels. Point the lane into the usual wind, onto ground fit for a belly landing. Without the lane the aircraft does not arm and shows “lift: no landing lane (JUMP_TAG 900)” (LCK_LANE_REQ1, th-avionics 82d6538). SetSCR_USER1to the landing heading of the field in degrees. That is the heading of the nose on the final approach: into the usual wind, along the lane. An RTL near home flies its VTOL approach down that axis (axis_approach_brake.lua). At 0 it flies the approach toward north. -
Calibrate the sticks. Make sure that roll, pitch and yaw read 1500 at centre (
RC1_TRIM,RC2_TRIM,RC4_TRIM1500). An off-centre trim moves the landing target (Q_OPTIONSbit 17). -
Move channel 5 through its six positions. Make sure that the GCS shows QSTABILIZE, QHOVER, QLOITER, AUTO, RTL and FBWA. On the transmitter, set channel 12 to +100 %. With channel 12 low, the GPS-loss guard reads no pilot and lands the aircraft by itself. Set channel 11 to -100 % (0 ms for the latency pre-arm; th-avionics b6010ac).
-
Set
AHRS_ORIENTATION: no source shows the board’s arrow, so the bench sets it. With 0 loaded, raise the nose about 30 degrees and read the GCS. Pitch up means 0 (arrow forward); roll right means 2 (Yaw90); pitch down means 4 (Yaw180); roll left means 6 (Yaw270). The 30.5 mm square fits the plate only in 90 degree turns, so no other value can be right. Set it, reboot, and redo the accelerometer calibration. Then tilt the aircraft by hand. Make sure that the horizon on the GCS moves the same way (th-avionics, 1fc7213). -
Put the aircraft level. Set
AHRS_TRIM. -
Calibrate the compass. Do these in this order:
- Know the compass. On Fuselage C v2.4B the only compass is the QMC5883L in the SEQURE M10-25Q,
the second GPS (th-avionics f7b6ae3f).
COMPASS_DISBLMSK1048576 inparams/airframe.parmturns off the Q43’s QMC5883P. The QMC5883L’s bit (12) stays clear. - Check the IMU lane. The board has one IMU (
EK3_IMU_MASK1, th-avionics 0ee6365), so there is no IMU lane to switch and EKF3 has no other IMU if this one fails. Make sure that the GCS shows one EKF lane and no “IMU1 missing” message, which would mean a mask of 3 was left in place. - Know the starting orientation.
params/airframe.parmsetsCOMPASS_ORIENT0 andCOMPASS_AUTO_ROT2, which corrects the yaw part during the calibration. ArduPilot’s QMC5883L driver already applies ROLL_180 for an external chip, so 0 is correct for the module upright with its arrow forward. th-blender’s hanger for the M10 sets the final yaw (th-avionics f7b6ae3f). - Before the calibration, fit the Hatch and the canopy, and close every other cover. th-telemetry checks again the distances from the Hatch’s magnets and the beacon board to the M10.
- If the beacon board is fitted, do not open a WiFi session on it during the calibration. The first build has no beacon board.
- Do the calibration. Then read
COMPASS_ORIENT(the GCS also shows the orientation it found). - Read the result. The GCS must report the calibration as good, and each offset
(
COMPASS_OFS_X,_Yand_Z) must be under 600. An offset of 600 or more means that something magnetic is near the M10. Find it. Do not fly (th-telemetry 6057d06c). - Confirm the orientation by hand with the raw field on the GCS, in the northern hemisphere:
nose down raises MagX, right wing down raises MagY, and the aircraft held inverted lowers
MagZ. If all three are correct, send the value to th-avionics, who puts it in
params/airframe.parmin place of the 0. - If one of the three moves the other way, do not fly. Do not redo the calibration: with the
orientation already chosen, the same calibration usually chooses the same wrong one. Write
down the three signs and the
COMPASS_ORIENTvalue and send them to th-avionics, who works out the correct orientation from the signs; then set it and calibrate again. A wrong sign more likely means a sensor that is not seated or a reversed lead than a calibration fault (th-avionics, 2026-10-07). - Remove the Hatch and fit it again, two times, and do the same with the canopy. After each fit the heading, with the aircraft in the same position, must stay within 1 degree.
- Keep the aircraft still and set ELRS telemetry to full power, then off. The heading must stay within 1 degree.
- If either check fails, do not fly. First check the Hatch magnets’ polarity, and do not calibrate again with the Hatch off (electronics-notes, “Compass calibration on Fuselage C”).
- Know the compass. On Fuselage C v2.4B the only compass is the QMC5883L in the SEQURE M10-25Q,
the second GPS (th-avionics f7b6ae3f).
-
With the TFmini-S cover fitted, make sure that the GCS rangefinder reading tracks a hand moved under the lens, about 0.1 to 7 m. Make sure that the airspeed sensor is found at boot: the I2C MS4525DO on the GPS port’s I2C, shared with the Q43 (
ARSPD_TYPE1,ARSPD_BUS0), not a DroneCAN node. With the Pixhawk 6C Mini or our own flight controller, this step is the CAN bus check instead: bus 1 no nodes andCAN_D1_UC_ESC_BM0 with the 4-in-1, bus 2 the fitted nodes. -
Do a check of the 4-in-1 telemetry at rest. All four channels must report voltage and temperature on SERIAL5 (USART2, the ESC #1 port’s telemetry pin,
SERIAL5_PROTOCOL16). Then the servo supply: with no servo connected, measure each Micro BEC’s 5 V output and record it. Each must be from 5.0 to 5.3 V. Fit the 1000 µF capacitor at the servo end of each run and apply power: the voltage must rise one time and stay. If it rises and falls again and again, stop: the BEC’s over-current protection is cycling. Load each run with 2 A at the servo plug for 5 s or less. The drop from the BEC’s output pads to the plug must be 150 mV or less. Connect the servos. Hold one elevon against its stop and measure at that servo’s plug, then the other: each must read 4.8 V or more (electronics-notes.md bench step 3, th-avionics 06a05a60). With the slider script running (CGS_ENABLE1), compare the GCS’s SRVV with the meter at BEC A’s output pads, and SRVB with the meter at BEC B’s output pads. If one differs by more than 1 %, edit that channel’sVOLT_TRIMincg_slider.luaon the SD card to the ratio. A and B are constants in the script, not parameters (th-avionics 4fbfa0e6). -
Before the motor test, look at the Lucid’s silkscreen. M1 and M3 must be on the starboard end, which is the battery tabs’ end. M1 and M2 must be on the upper edge. On Fuselage C v2.4B the 4-in-1 stands on edge, component side aft, battery tabs to starboard (TBS manual p. 97; th-avionics 83afd9d0). The output map (in both board files) is not ArduPilot’s default order. The two lists below are different orders; do not mix them. Outputs, by wiring: output 1 front starboard (
SERVO1_FUNCTION33), output 2 front port (SERVO2_FUNCTION35), output 3 rear starboard (SERVO3_FUNCTION36), output 4 rear port (SERVO4_FUNCTION34). Read the board file’s map on the day. Motor test, by ArduPilot’s test sequence: Mission Planner’s A, B, C and D spin front starboard, rear starboard, rear port and front port in turn. Run the motor test. Check by position, never by output number: each test letter must turn the pod named, in its direction. Set the direction in the AM32 configurator, not by an ESC node id. -
Make sure that all four rpm values arrive over bidirectional DShot (outputs 1 to 4) during the test. Make sure that each rpm is plausible.
MOTOR_POLESis 14. -
Program the Lucid 4-in-1 in the AM32 configurator, all four channels, and read every value back (th-avionics, 88bddd5): brake on stop ON, because the lift propellers fold; low voltage cutoff OFF; stuck rotor protection ON, so a channel with a dead or shorted motor quits rather than cooks; temperature limit DISABLED (th-avionics a5eb5c7), because above its limit AM32 cuts that channel to about a quarter power at once, which on a lift motor is a motor-out, and the heat is watched in steps 30 and 41 instead; motor poles 14; direction per pod from the motor test. Do not confuse these with the Aria pusher ESC in step 20, whose brake is OFF. Make sure that each folding propeller stops braked.
-
Set FBWA. Move the roll stick to the right. Make sure that the right elevon rises. Pull the pitch stick. Make sure that both elevons rise. The elevons are outputs 5 and 6 on this board (
SERVO5_FUNCTION77,SERVO6_FUNCTION78). -
Tilt the aircraft. Make sure that the elevons move against the tilt.
-
Do a check of the elevon endpoints and the trim against
params/airframe.parm. The trim starts at the predicted cruise up-elevon, at 16 µs per degree (elevon-throw.md).- Take the predicted up-elevon from cg.md’s first-build table (Fuselage C v2.4B, our wing), the 22 m/s indicated row, at the measured CG. At 268 mm that is 4.8° trailing edge up, about 77 µs toward up (th-aeronautics 4aeeb934). Do not use the earlier wing’s table below it.
-
Before the first pusher run, program the pusher ESC, the DYS Aria 70A AM32 (Ryan, 2026-10-04; th-avionics 58a861d), in the AM32 configurator (esc-configurator.com, with the USB linker on the signal wire or the flight controller’s pass-through): brake on stop OFF, so the propeller freewheels at zero throttle; low voltage cutoff OFF, because a cutoff would throttle the pusher on its own when a sagging pack crosses it, and the battery failsafes in the common file are the only low-voltage action; temperature limit DISABLED (a5eb5c7), as on the Lucid; motor direction so that the pusher blows aft; motor poles 14 (check the ECO II 3115’s count); servo low and high thresholds 1000 and 2000 µs. Read every value back; do not trust the configurator’s defaults.
SERVO7is 1000 to 2000 µs to match. Make sure that the motor is still at 1000 µs and starts just above it. The first build flies a fixed APC 10x7E pusher propeller (Ryan, 2026-10-04), not the folding one. Make sure that the propeller nut is torqued, and that the propeller is on the right way for a pusher: its pitched face aft, the motor reversed in the ESC or by swapping two motor leads so that it drives air aft. Then run the pusher (output 7,SERVO7_FUNCTION70) at low throttle. Make sure that it turns in its direction. Note which way the propeller turns seen from behind and write it on the build sheet: by APC’s convention the LP10070EP with its front face forward turns counter-clockwise seen from behind (th-avionics; th-simulator needs the measured sense for the sim’s film renders). -
Airspeed plumbing. The first build has flush side static ports in the nose ring (Ryan, 2026-10-06; th-blender W77 e5c82146): a 1.7 mm hole each side at Y 40, Z -10, teed to the MS4525’s static nipple, the tube giving total pressure only. Prove the plumbing before the first flight (th-avionics): tape one side port and breathe gently into the other with the tube tip open; the reading must rise, which proves that port reaches the sensor. Swap and repeat for the other port. Then tape both side ports and blow into the tube tip; the reading must rise (
ARSPD_TUBE_ORDR2). A reading that drifts back to zero while you hold the pressure is a leak.ARSPD_RATIOstays 2.3 andARSPD_AUTOCALis 0 (th-avionics b1b5ed6f). Do not run the in-flight airspeed calibration. On these ports it converges near 3.0. At 3.0 the forward transition ends at about 16 m/s true, which is the stall speed. At 2.3 the airspeed reads about true at the end of the transition. Everywhere else it reads low: about 13 % low at cruise and 17 % low near the stall. The aircraft flies faster than it shows. No fallback on Fuselage C: the static ports are part of the Fuselage Front, behind the Y 30 split, so every nose has them, and our total tube has no static holes. TheARSPD_RATIO2.0 figures for the kit tube’s own static holes (th-avionics 6113fa9) applied to the retired kit-tube nose.- Cover the pitot mouth at every power-up, field or dock, from power-up until the GCS shows “Airspeed 1 calibrated”, then remove the cover (th-avionics). ArduPilot takes the airspeed zero in about 1 s at boot and keeps it until the next power-up or a preflight calibration. The dock re-zeroes before every launch with the lid closed (hangar); a field power-up has no such step. Wind on the mouth in that second becomes the zero: a tailwind makes the airspeed read high for the whole flight, so the transition ends slower in true speed, about 0.5 m/s at 4 m/s of wind (th-avionics, estimate).
- The cone check, after each nose cone fit and before the next flight (th-avionics). The tube rides in the nose cone unit (th-blender W93.2 60f05e70; our own 4 mm brass total tube since W104 888383ba). When the cone comes off, the 3 x 5 mm silicone sleeve comes off the aft end of the brass tube, and it goes on again as the cone goes on. You cannot get to the joint with the Hatch open. A sleeve that is only part of the way on leaks, and then the airspeed reads low with no other sign. Blow gently into the tube tip and hold the pressure: the airspeed must rise and stay up. Then tape one side port and apply gentle suction to the other: the airspeed must rise and stay up. If a reading decays, remove the cone, push the sleeve fully on, fit the cone and do the check again. After the check, remove the tape and look at both side ports: they must be open. A side port left taped gives one-sided static pressure, which reads wrong in a sideslip, with no warning (th-avionics).
-
Measure the pack voltage with a meter. Make sure that the GCS agrees to within 0.1 V.
-
Make sure that the current is plausible at motor-test throttle.
- First, at the first power-up with the PM02 and the pack, propellers off and nothing turning: read the battery current in the GCS. It must show the idle draw of the avionics, an estimated 0.5 to 1.5 A until it is measured, and never about 5.5 A. If the GCS shows about 5.5 A, the PM02 current signal is not connected: do a check of the lead to pin 3 of the ESC #1 port (th-avionics, from lux-765’s bench reading). With that lead open, the board counts a steady 5.5 A against about 34 A in a hover, so the 45% and 30% capacity failsafes come about six times late.
- Measure the idle current with a DC clamp meter on one pack lead, or with an inline DC power
meter between the pack and the aircraft (th-avionics). The clamp meter must be a Hall-effect
type that reads DC: an AC-only clamp reads zero. Send both readings, the meter’s and the
GCS’s, to th-avionics. They set
BATT_AMP_OFFSETinparams/airframe.parm.
-
Video on at boot: power up with no GCS action. The goggles must show the picture (
RELAY2_DEFAULT1 on the S3 pad, GPIO 60). Then toggle relay 2 from the GCS. Make sure that the picture goes off and comes back. If it does not, the video switch lead is off S3. In the goggles, select the ArduPilot font for the OSD (SERIAL6 MSP DisplayPort;OSD_TYPE20 clears the second DisplayPort OSD the LUX’s defaults turn on). If the OSD symbols come out wrong, setMSP_OPTIONS4 (Betaflight fonts) and select the Betaflight font instead (th-avionics 69aa35a). -
Cargo door: not on the first build (th-main; the bay is closed by the Payload Cover, the door is a later build), so the gripper is off (
SERVO9_FUNCTION0,GRIP_ENABLE0; th-avionics 0f99e42) and S1 has no lead. Make sure that nothing is on S1. When the door is built, this step returns: at boot the latches must sit closed (GRIP_NEUTRALis the grab position); sendDO_GRIPPERrelease and make sure that the latches open; close both halves by hand, the port half first (the +X half, rebated, no lip), then the starboard half (the -X half with the lap lip, which must close last), then send grab. The order is set by the geometry (th-blender, 2026-10-04), and the board files say the same. -
Strobe: not on the first build. The Survey3W is not fitted, so output 8 is empty (
SERVO8_FUNCTION0,CAM1_TYPE0,SERVO10_FUNCTION0; th-avionics 9a6bcec4). The camera rows are comments inparams/board-luxf765.parm. Make sure that nothing is on output 8. When the Survey3W is fitted and its rows are set, this step returns: trigger one photo from the GCS (DO_DIGICAM_CONTROL). In the log, the CAM message must carry the feedback time, not only the trigger (CAM1_FEEDBAK_PIN59, the S2 pad). If only TRIG appears, the strobe lead is off S2. Each of these three fails silently with a lead on the wrong pad (th-avionics, 2026-10-04). -
Wait for a 3D GPS fix. Record the RTK state. Make sure that
GPS1_POSmatches the Q43’s position as fitted. Then check the compass against a surveyed line, at the field with the Q43 in RTK fixed (th-telemetry 6057d06c). The compass has no second compass to compare with, so the line is the reference:- Set two stakes 10 m or more apart on level ground. Hold the aircraft’s GPS dome over each
stake in turn, with RTK fixed (
GPS_RAW_INTfix type 6). Record each position. The GCS’s measure tool gives the bearing from the first stake to the second: that is the line’s true bearing. - Lay a straight edge along the line. Set the aircraft on the edge, level, powered and with the motors off. Point its nose toward the second stake. Then turn it to 90, 180 and 270 degrees with a square against the edge.
- At each of the four headings, compare the GCS heading with the line’s bearing plus 0, 90, 180 or 270 degrees. Each must be within 3 degrees. ArduPilot applies the declination itself.
- If one heading is 3 degrees or more off, do not fly. Send th-telemetry the four readings.
- Power everything on the ground: lights on, VTX on, and the motors armed at idle if the step allows it. The GCS must show no “compass inconsistent”, “mag anomaly” or “mag field” message.
- Make sure that
EK3_GSF_RUN_MASKandEK3_GSF_USE_MASKare 3, as inparams/airframe.parm. The EKF’s GSF yaw estimator is the fallback if the compass fails in flight, because there is no second compass.
- Set two stakes 10 m or more apart on level ground. Hold the aircraft’s GPS dome over each
stake in turn, with RTK fixed (
-
Check the LoRa telemetry radios (th-telemetry). The settings are the radios’ own, not ArduPilot parameters, so
check_params.pycannot see them. Do these in this order:-
Connect to the dock unit’s CLI (D4 and D5, 115200) with the aircraft unit linked, and run
pl. -
Both units must show:
- RF Band 915 FCC;
- Mode 31 Hz;
- the pair’s bind phrase, the same on both (never write the phrase itself on this card);
- Tx Power 20 dBm and Rx Power 20 dBm (a new unit starts at 17 dBm);
- Rx Ser Baudrate 115200 (the default is 57600;
SERIAL2_BAUD115 on the flight controller); - Rx Snd RadioStat ardu_1;
- Tx Snd RadioStat 1 Hz (the dock unit offers off or 1 Hz only);
- Rx Snd RcChannel off. The aircraft takes RC over ELRS. With rc channels on, the mLRS
default floods the flight controller’s serial at about 3,600 B/s and drops 5% of
telemetry frames. It could also win ArduPilot’s RC detection at boot, without
RC_PROTOCOLS512 (CRSF only, th-avionics 0ba4cc0). That happens if the ELRS transmitter is off when the aircraft powers up (th-telemetry, th-mlrs-xiao’s bench test, 2026-10-06).
-
Send the
pldump to th-telemetry before the first flight. The source list is~/claude/drone/mlrs-xiao/docs/unit-setup.md. -
Know the radio’s LED. It does not prove the radio works. Since mlrs-xiao f88245ff the XIAO refuses to start with no radio, and its LED shows it:
- 0.5 s on and 0.5 s off: waiting for the link;
- solid: linked;
- five flashes a second: bind;
- a fast dim shimmer: a radio fault, do not fly.
That check proves only that a chip answered at power-up, not the RF path and not a Wio that works loose later. A shimmer is a reason to stop; a good LED is not a reason to go. Only a live link proves the radio, which is the
pldump read over the air in this step. -
Know the radio arming check. The flight script checks the radio before every arming (
TH_RAD_REQ1 inparams/airframe.parm, th-avionics b7a0937d). Arming waits until the radio has sent its status and its values for 12 s. The pre-arm texts:- “no telemetry radio on TELEM2”: the radio is off, not connected or not on TELEM2;
- “radio: no values (signing key?)”: the status comes but the values do not; with MAVLink signing, the key is wrong;
- “radio: settling, 12 s”: wait;
- “LoRa radio fault”: a LoRa chip is missing, and the refusal stays until the next power-up.
-
On a radio with one LoRa chip,
RSSI_Bis always -127. That value means “no antenna B”, not a weak signal (failsafes.md, “Pre-arm: telemetry radio”). WARNING: Keep everyone clear of all five propeller arcs. The compass current run takes the motors to hover current with the propellers fitted. Tie the aircraft down to a fixed point, level and still, before you arm.
-
-
Measure the compass interference from the motor currents. ArduPlane has no compassmot, so the compensation is fitted from a log (th-avionics 248e150 and aeb0eea, th-telemetry). The compass is the M10-25Q’s QMC5883L under the Bay roof; the Q43’s compass is off. The lift feed passes it forward and the pusher feed beside it, so their fields point different ways. One
COMPASS_MOTvector cannot cancel both, so the run has two clean phases (th-telemetry 550fa465). Do these in this order:- Fit the propellers. Tie the aircraft down, level and still, where the heat run of step 30 will be.
- With the motors off, record the heading (cold), for the check after the heat run in step 30.
- Set
LOG_DISARMED1. - Phase 1, pusher off: in the motor test, run all four lift motors together. Step up to hover current in steps of about 10 s, then back down. Hover current is about 29 A, 7.3 A a motor (6.7 to 7.8, on the F8041 3-blade and EMAX’s published winding resistance, th-aeronautics c49c8d9).
- Hold the lift motors at hover current for 30 s at one heading. The heading’s standard
deviation over the 30 s must be 1 degree or less (from the log’s EKF yaw). On the night
build, run this with the position lights on at their night duty (
LGT_POS_PCT33 %). The lights node’s 400 Hz PWM could alias into the compass (th-avionics). - Phase 2, lift motors off: step the pusher the same way.
- Note the log time at the start and end of each phase.
- In the same tie-down, after phase 2 and before
LOG_DISARMEDgoes back to 0, do the lift motor noise check of the ELRS antennas (antennas, bench test 3; th-telemetry bc52201f, b66c243c): 30 s with the lift motors at hover current, then 30 s with them stopped, then the same pair again (A-B-A-B, about 1 minute of motors in all). Each antenna’s mean RSSI with the motors running must be 2 dB or less below its value with them stopped. Keep it out of the two compass phases. Watch the 4-in-1 temperatures and stop at 80 °C (the CAUTION after this step). - Set
LOG_DISARMEDback to 0. - Run
tools/fit_compass_mot.py <log> --window T0:T1 --mag <the M10's instance>for the lift phase, and the same with--hover 33for the pusher phase. The tool printsCOMPASS_MOT_X,COMPASS_MOT_YandCOMPASS_MOT_Z, the interference share and a verdict line. - Read the verdicts, which are th-telemetry’s:
- both phases under 3 degrees of heading error (lift at 29 A, pusher at 33 A): no compensation is needed;
- otherwise load the lift phase’s rows into
params/airframe.parm(COMPASS_MOTCT2) if its residual is under 1 degree, and check the pusher phase against them (the next bullet); - over 30% of the field in either phase, a lift residual of 1 degree or more, or the pusher phase at 3 degrees or more with the lift rows applied, is NO-GO: re-route that feed away from the compass before you fly, do not compensate.
- If the lift rows were loaded, check the pusher phase against them. Run the tool on the pusher
window with
--hover 33 --vector <the lift phase's COMPASS_MOT_X,Y,Z>(th-avionics 9f534a72). Under 3 degrees is GO. 3 degrees or more is NO-GO: re-route the pusher feed away from the compass; do not compensate. - If the tool warns that the compass is not a QMC5883L, check
--mag. - If the script warns that the attitude moved, the tie-down was not firm; run it again.
- Remove the propellers.
On Fuselage C v2.4B the Lucid stands on edge behind the pack. The compass is the M10-25Q’s QMC5883L under the Bay roof at (-3, 409, 43). The pusher’s 12 AWG feed passes it at 65 mm or more at about 33 A in a climb. The lift feed and the Lucid’s leads are 150 mm or more away, and the pusher motor and the Aria 100 mm or more (th-telemetry).
CAUTION: Stop the 4-in-1 heat run by hand at 80 °C on any channel. The telemetry temperature is the ESC’s MCU die; th-aeronautics estimates the FETs run 10 to 20 °C above it during a fast rise, so 80 °C is a ceiling, not a target.
- First, the supply input spikes: on the thrust stand with a full pack (25.2 V) and the propellers fitted, connect an oscilloscope on single-shot trigger across one Micro BEC’s input pads, with its ceramic capacitors fitted. Do not use a meter’s max-hold: it is too slow to catch a brake-stop spike (th-eda). Run all four lift motors up to the cap and cut the throttle to zero, five times (the lift ESCs brake on stop). The peak must stay under 29 V: the BEC’s input maximum is 30 V. Do the check at the second BEC too. If a peak is 29 V or more, do not fly until the BEC12S-PRO replaces the two Micro BECs. Do the same at hub A’s BATT pads, with its 470 uF capacitor fitted. There the peak must stay under 26 V, the hub’s input maximum (electronics-notes.md power-up step 5, th-avionics 06a05a60). Then ESC heat, the 4-in-1 (th-avionics, from th-aeronautics’ thermal estimate: up to +140 K in 5 minutes with no airflow at the high-loss end): with the propellers fitted and the fuselage closed, run the aircraft on the thrust stand at hover throttle for 5 minutes. Log the ESC telemetry temperature of all four channels (SERIAL5, step 13). Stop at 80 °C (th-avionics a8d0707). From the ESC log, note the time at which the trace crosses 40, 50, 60, 70 and 80 °C. Send the trace and those times to th-aeronautics: the slope gives the real loss and retires their estimate. Then the compass after the heat: after the heat run, stop the motors and do not move the aircraft. Read the heading again within 1 minute. It must be within 3 degrees of the cold value recorded in step 29. The compass chip’s offset drifts as the bay warms (th-telemetry 6057d06c).
- ESC heat, the pusher: the Aria has no temperature telemetry. Run it at about 10 A for 10 minutes, then at 30 A for 60 s. Read its temperature at once with an IR thermometer or by touch, on its top face: th-aeronautics’ vent CFD (b8e2427) has the cruise airflow under the boards (1 to 1.4 m/s under the Aria) and nearly still above them, so the top face is where heat builds if the FETs face up; their estimate for the cruise rise is 15 to 35 K. Record the reading for th-aeronautics. Remove the propellers.
Failsafe checks, in this order
Section titled “Failsafe checks, in this order”Set TH_STAGE 2 for these checks. Then TH_CLR_1 and TH_CLR_2 must hold their codes.
Do these checks on the ground with the propellers off, armed in QSTABILIZE. Refer to
failsafes.md for the triggers, the action in each mode, the blocking conditions
and the recovery.
WARNING: Remove the propellers before the RC-loss check. Disarm at once after the mode check.
On the ground, QRTL skips its climb check and sets a target at Q_RTL_ALT (50 m). The
position controller can then command the lift motors to climb.
- Switch the transmitter off. After 1 s (
RC_FS_TIMEOUT), the mode must change to QRTL (Q_OPTIONSbit 5). Read the mode from the GCS and from the log. Disarm. Then do the tip-over check. Arm in QHOVER. Make sure that “tipguard: armed” shows: without it, the script is not running. Tilt the aircraft by hand past 60 degrees and hold it. In about 1 s it must disarm and show “tipguard: tipped over; disarmed” (tip_guard.lua, th-avionics 3482dc7). Arm again without a reboot: it must arm. Then save the script checksums. Disarm. First count the load texts that the GCS showed after the boot. There must be eight. Each one contains “loaded”, and the version numbers can change. The eight are “cgslider”, “lift: lift check”, “thprearm”, “gpsguard”, “tipguard”, “stuckguard”, “arspdorb” and “axisbrk”. If one is missing, that script did not load: do not save, and tell th-avionics. On the aircraft the stuckguard text must end “monitor only” (“stuckguard v7.1 loaded, monitor only”): the guard then only reports a stuck pitot and does not turn the airspeed off (th-avionics eecca0ab). If it does not end “monitor only”, do not fly, and tell th-avionics. The thprearm text also gives the number of gated parameters. It must equal the number of lines inth-clr-list.txton the card. If it is 0, the list file is missing. Make sure thatSCR_ENABLEis 1. Make sure that bit 4 (16) ofSCR_DEBUG_OPTSis clear. If either one is wrong, the scripting pre-arm is off. Add 32 toSCR_DEBUG_OPTS. The GCS must show “Scripting: saved checksums”, and the bit clears itself. Make sure thatSCR_LD_CHECKSUMequalsSCR_RUN_CHECKSUM: the scripts that loaded are running. The count above shows that all eight loaded. After that, a script that is missing, changed or stopped prevents arming. Save the checksums again after any change to a script on the card (th-avionics, th-hangar). - Make sure that the GCS has sent at least one heartbeat (system id 255,
MAV_GCS_SYSID). The GCS failsafe does not start before that. Arm in QSTABILIZE. Disconnect the telemetry link (the SX1262 LoRa module on TELEM2,SERIAL2_PROTOCOL2; th-telemetry, ca3ab38; the SiK is gone). After 5 s (FS_LONG_TIMEOUT), the mode must change to QRTL (FS_GCS_ENABL1). Disarm. In FBWA the same failsafe goes to RTL, withFS_LONG_ACTN0 as well. - Set
BATT_LOW_VOLTabove the pack voltage. Arm. Wait more than 10 s (BATT_LOW_TIMER). Make sure that the low-battery action is RTL (BATT_FS_LOW_ACT1). Near home, RTL hands over to QRTL. Disarm. SetBATT_LOW_VOLTback. Runtools/check_params.pyagain. - If the battery failsafe warns in FBWA, keep the throttle where it is, or select RTL at once. Do not pull the throttle to mid. At mid throttle the aircraft sinks about 3.3 m/s. That is 32 m in the 10 s before the RTL (SITL, th-avionics, failsafes.md).
- Do not test RC loss in fixed-wing flight on this card. That test waits for the combined
flight script (
far_returnandspdweight_band), on a later card. Know these two actions:- GPS loss. Know it before the first hover.
- A GPS loss starts after 2 s with no 3D fix from 6 or more satellites on either receiver. Only 10 s of good fix ends it, so the short false fixes of a jammed GPS cannot end it.
- If only the Q43 fails and the M10 has a good fix, the script makes the M10 the primary GPS. It shows “gpsguard: GPS1 fault, flying on GPS2”, and the flight continues without RTK. After 10 s of good fix on the Q43 it shows “gpsguard: GPS1 back, primary restored” (th-avionics 78449fb9).
- At a GPS loss, the flight script stops the EKF use of the GPS. It shows “gpsguard: GPS lost, EKF off GPS (source set 2)”. In a VTOL mode that holds a position (QLOITER, QRTL, QLAND, AUTO or GUIDED), the script selects QHOVER.
- With channel 12 high, it shows “gpsguard: GPS lost, QHOVER: fly and land by hand”. Hold the position with the sticks, land by hand and disarm by hand.
- With channel 12 low, the script lands the aircraft and shows “gpsguard: GPS lost, QHOVER: landing here”. Above 10 m over home it descends at full rate. Below that it descends at about 0.7 m/s and disarms after touchdown. If the fix comes back during that descent, the landing continues. To take control during that descent, set channel 12 high.
- With no RC, it descends at 0.5 m/s and disarms after touchdown.
- The EKF failsafe can also select QHOVER. Then, with channel 12 low, the script lands the aircraft in the same way. It shows “gpsguard: GPS lost, EKF failsafe: landing here”. In AUTO the EKF failsafe first selects QLAND. If it then fires again, it selects QHOVER. The script then lands the aircraft (th-avionics d4f67ef4, failsafes.md).
- After a “gpsguard: GPS lost” message, if the aircraft climbs or does not descend when you lower the throttle, select QSTABILIZE. Then land by hand with the throttle. In QSTABILIZE the throttle sets the motor power directly. A jammed SITL aircraft landed level from 30 m at 0.7 m/s (th-testpilot, 2026-10-15).
- After a GPS-loss landing, keep everyone away until the GCS shows DISARMED.
- Lift motor failure. Know it before the first transition.
- On the wing,
lift_check.luachecks the lift motors. A failed check shows “lift: motor 1 low (0 rpm), checking again” (the motor number and rpm vary). A second failure shows “lift: motor 1 not turning, VTOL locked out”: the aircraft then lands fixed-wing on the lane. - After either message, do not fly slow on the wing below 60 m. Climb first. A stall with VTOL locked out lost 42 to 49 m in SITL before the recovery (F11-lck-dive, th-avionics, 2026-10-12).
- After the landing, the aircraft does not arm again. The pre-arm shows “lift: motor 1 failed in flight, reboot” or “lift latched; checklist after”. Which of the two shows depends on the script load order. Only a reboot clears it. Do not reboot to fly again: find the failed motor first (th-avionics 9ce46172).
- On the wing,
- Airspeed sensor failure. Know it before the first transition.
- If the GCS shows “Airspeed sensor 1 failure. Disabling”, or the airspeed reads wrong, fly one full circle on the wing at 50 m or more. Make it last 60 s or more. Do this before you slow down, start an approach or select a VTOL mode.
- Until that circle, the airspeed that the autopilot uses is the ground speed: too high
downwind, too low upwind. In SITL without the sensor,
lift_check.luacaught a dead lift motor in 0 of 6 slowdowns without the circle and in 6 of 6 after it (th-testpilot cc6d5d92).Q_OPTIONSbit 12 (th-simulator d514f25d) stops the speed assist that the estimate would otherwise start.
- GPS loss. Know it before the first hover.
The first hover
Section titled “The first hover”a6f7307, 4 m/s from 240°, SITL's own Dryden gusts (seed 7). How it was flown, and the other films. Soundtrack, off until you unmute the player: Satie, Gymnopédie No. 1 (Robin Alciatore, piano; Musopen, public domain), from Wikimedia Commons. Flown by ArduPilot; the logo on the title card is the project's own, used under CC BY-SA 3.0.Every boot sets TH_STAGE back to 3. To fly, TH_CLR_1 to TH_CLR_3 must hold their codes, and
TH_CLR_4 too for a night flight (LGT_NIGHT 1).
The manual’s maiden hop comes first (assembly manual). The QLOITER hover in this card comes after it.
Before each flight on this card: if the nose cone came off after its last cone check, do the cone check of step 21 again. At each power-up, cover the pitot mouth until the GCS shows “Airspeed 1 calibrated” (step 21).
- Fit the propellers. Fold each lift propeller. Make sure that the brake holds it.
- Wind: 5 m/s or less, along and across.
CAUTION: Land if any ESC channel reads more than 80 °C in a hover. The reading is the MCU die, which lags the FETs. The 4-in-1 sits in the closed fuselage, and the first hovers show whether the bay needs more air.
- Do the manual’s maiden hop: arm in QSTABILIZE, lift to 1 m, hover for 30 s, land.
- Take off in QLOITER to 5 to 10 m over home. Hover for 60 s. Land. With the throttle stick
fully down, QLOITER and QHOVER descend at 1.5 m/s at most (
Q_PILOT_SPD_DN1.5, th-avionics 2694f27). In SITL that gave a touchdown at 1.0 m/s. - Read the hover log. The learned hover throttle (
Q_M_HOVER_LEARN2) must be in the expected range. No lift output may sit near 2000 µs. Vibration must be below 30 m/s². Clipping must be 0. The four pods must show the same ESC current and temperature, within the usual spread. Read the 4-in-1’s temperature trace against hover time and send it to th-aeronautics: a slope near the top of their estimate brings a hover CFD with rotor disks.INS_LOG_BAT_MASK1 records the batch sampler for a later notch filter. The log buffer is 16 KB on the LUX (LOG_FILE_BUFSIZE, default 80; th-avionics e29b65c9). ReadDp(dropped log blocks) in the DSF messages. It must be 0 for the whole flight. Record the lowestFMn(the smallest free space in the log buffer, bytes). IfDpis more than 0, orFMngoes below 4096 bytes, send the log to th-avionics. The 4096 bytes is a quarter of the buffer, a margin for a busier flight. It is an estimate, not a measured value. - Make sure that the airspeed reads 2 m/s or less in the hover in calm air (wind less than 1 m/s). In wind, the pitot reads the wind when the nose points into it: in SITL, in 4 m/s of gusty wind with the nose within 20 degrees of it, the reading was 2.1 m/s on average and 3.5 m/s at the 90th percentile (th-testpilot, 2026-10-20). If the reading stays above the gust speed for 2 s or more, send the log to th-avionics.
- Do a check of the position hold with the new position gains (
Q_P_NE_POS_P1.0,Q_P_NE_VEL_P1.4,Q_P_NE_VEL_I0.7, th-avionics 42b97fe). They are a SITL starting value. On the same 84 seeded dock landings they captured 84 of 84. Plane’s defaults captured 53 (on the folding pusher’s limit; the fixed APC’s can only raise it). SITL showed no ringing. In the QLOITER hover the position must hold within about 0.3 m in calm air, with no visible back-and-forth. In the log, the PSCN and PSCE position and velocity traces must show no sustained oscillation. If it rings, land. Halve the step back toward Plane’s defaults (0.75, 1.0, 0.5) and fly the hover again. Do not fly a dock landing before this check passes. The battery failsafes use the raw pack voltage, so the hover sag counts toward the 21.0 V threshold. Keep the hovers short. - Take off in QLOITER to 5 to 10 m over home. Switch the transmitter off. The aircraft must
return and land at home with no approach (
Q_OPTIONSbit 16). Switch the transmitter on. A launch from the dock with no GCS connected has no GCS failsafe. Refer to failsafes.md.
The first transition
Section titled “The first transition”822d120, 4 m/s from 240°, SITL's own Dryden gusts (seed 7). How it was flown, and the other films. Soundtrack, off until you unmute the player: Grieg, Morning Mood (Musopen Symphony, 2012; public domain), from Wikimedia Commons. Flown by ArduPilot; the logo on the title card is the project's own, used under CC BY-SA 3.0.WARNING: Stay clear of the area below the aircraft during the transition. A failed transition can lose 30 m or more before the assist holds the aircraft.
- Make sure that the assist parameters are
Q_ASSIST_SPEED18,Q_ASSIST_ANGLE30 andQ_ASSIST_ALT30.- Make sure that
AIRSPEED_MINis 20 andTECS_LAND_ARSPDis 20 (th-simulator 7a2d664c, 2026-10-18;AIRSPEED_MINwas 18). The transition ends when the indicated airspeed passesAIRSPEED_MIN. The static ports read high at low angle of attack, so at 18 the transition can end at a true airspeed near the stall.
- Make sure that
- Make sure that
AIRSPEED_STALLis 20.0 (th-avionics, 0634db5, 2026-10-01: a margin setting until the stall test; it was 19.2). Do not tune the pitch loop on these flights. Do not fly below 19 m/s. On Fuselage C the fine CFD shows a mild softening and an unsteady pitching moment between 9.5 and 10 degrees of angle of attack, with about 5.3% of static margin left at 267 mm (th-aeronautics 5d15e8b1, estimates). That band is about 17.5 to 17.9 m/s EAS in trim. The 20.0 floor keeps TECS above it. - Take off in QHOVER. Climb to 50 m or more. Turn into the wind. 50 m is 20 m above
Q_ASSIST_ALT. - Select FBWA (channel 5, position 6). Set full throttle as you select FBWA. Hold it until the
airspeed passes 21 m/s. Then set the cruise throttle, about 65 % (
TRIM_THROTTLE; level flight on Fuselage C takes about 63 % at 21 m/s indicated and 65 % at 22, th-simulator eaf7758e, th-avionics 822d1202; at 58 % the airspeed fell into Q-assist in SITL). Monitor the airspeed and the height. In SITL from a 60 m hover, FBWA at full throttle lost 2 to 4 m. At 80 % throttle it lost 13 m in calm air and 23 m in 8 m/s gusts (th-testpilot, 2026-10-18; th-avionics).- On the Fuselage C model at
AIRSPEED_MIN20 andPTCH_TRIM_DEG5, with the static-port error modelled, 252 SITL transitions ended at 19.8 m/s true or faster (th-testpilot dd6577cd and the adoption check that follows aceda6c9). - With the sticks centred, the height lost after “Transition airspeed reached” was not more than 0.1 m in calm air. In 5 and 8 m/s gusts it was not more than 2.2 m in 240 transitions.
PTCH_TRIM_DEG5 is the reason. While the lift motors stop, they hold the pitch that FBWA asks for at centred sticks. With a trim of 0 that pitch is about 1 degree, which is nose low for this aircraft below about 27 m/s. Then 59 of 240 gusty transitions lost more than 5 m, the most 12.2 m, and 5 of 252 ended below 18 m/s true. Start the transition at 50 m or more, as step 47 says.
- On the Fuselage C model at
- If the aircraft sinks or the airspeed does not rise, select QHOVER.
- Fly straight and level for 30 s at the trim speed. Record the airspeed and the up-elevon.
At
ARSPD_RATIO2.3 the airspeed reads about 13 % low at cruise. At 21 m/s indicated the aircraft flies at about 24 m/s true. Compare the up-elevon with the SITL table at the true speed, not the indicated one (th-avionics b1b5ed6f).- Record the pitch angle in the straight and level flight.
PTCH_TRIM_DEG5 comes from the SITL cruise pitch of about 5.3 degrees (th-avionics). Send the recorded pitch to th-avionics, who setsPTCH_TRIM_DEGfrom it.
- Record the pitch angle in the straight and level flight.
- Select QHOVER. Land.
The doublets
Section titled “The doublets”Do the doublets on the second transition flight or later, with the aircraft trimmed. Each doublet is a small, quick stick input in FBWA: one way, the other way, centre. The log gives the elevon deflection and the body rate; the mode does not matter for the ratio.
- Climb to 100 m or more in FBWA. Set the speed to 21 m/s. Fly wings level, into the wind.
- Pitch doublet. Pull the stick a small amount for a quarter of a second. Push it the same amount for a quarter of a second. Put it to centre. The target is 3 degrees of elevon (48 µs). Let the aircraft settle for 6 s.
- Roll doublet. Move the stick a small amount to the right for half a second. Move it the same amount to the left for half a second. Put it to centre. The target is 1.5 degrees of differential elevon (24 µs). Let the aircraft settle for 6 s.
- Do each doublet three times.
- Select QHOVER. Land.
After the doublets
Section titled “After the doublets”- Download the flight log.
- For each doublet, read the peak elevon deflection from trim, in µs. Read the peak body rate in the first second after the first edge. Divide the rate by the deflection.
- Compare the ratios with the table. Use the median of the three.
- Set
RLL_RATE_FFto 0.311 multiplied by (0.87 divided by the measured roll ratio). SetPTCH_RATE_FFto 0.801 multiplied by (0.535 divided by the measured pitch ratio), that is 0.43 divided by the measured ratio. The start value stays 0.801: every SITL flight flew it on the 0.535 plant and passed, so it is the matched value (th-avionics 5763214, th-aeronautics, 2026-10-05). The earlier 0.76 base rested on a 4.9% rise inc_m_deltaethatc_m_qmatched, so it cancelled; it was never flown. - Send the new values and the log to th-avionics. th-avionics writes them into
params/terrahawk-common.parm. Do not leave the change in the GCS only. - Do not fly a banked survey turn before th-avionics has written the new values.
- In the log of the first survey with banked turns, read ARSP.TR (the airspeed consistency
test ratio). Send th-avionics the peak value and the percentage of time above 4. In SITL on
Fuselage C the peak was 4.6 to 4.7 and the time above 4 was 0.7 to 1.7% (th-testpilot,
thread 52278672): the ports’ low reading at
ARSPD_RATIO2.3 raises it from about 2. - If ARSP.TR stays above 5 for 2 s or more, or is above 4 for more than 10% of the survey, do not fly more surveys until th-avionics has looked at the log (th-avionics: ArduPilot turns the sensor off after about 4.4 s above 5, or at about 64% of the time above it).
- If the GCS shows “Airspeed sensor 1 failure. Disabling” in flight, fly the airspeed sensor failure procedure of step 36: circle on the wing for 60 s or more, then land.
- In the log of the first survey with banked turns, read ARSP.TR (the airspeed consistency
test ratio). Send th-avionics the peak value and the percentage of time above 4. In SITL on
Fuselage C the peak was 4.6 to 4.7 and the time above 4 was 0.7 to 1.7% (th-testpilot,
thread 52278672): the ports’ low reading at
- Check the telemetry radio’s cradle after the first flights, and after any long hot day
(th-blender, 1d6c32c). The XIAO ESP32-S3 and the Wio-SX1262 sit in a snap-fit cradle on the
flight controller plate, and the lid’s 0.1 mm preload is all that keeps the two boards’ DF40
connector seated. PETG creeps under a steady load, more in a warm bay with vibration.
- With the payload cover off, press the lid. It must not rattle or move.
- The Wio must sit fully down on the XIAO, with the DF40 fully home and no gap at the connector.
- Confirm that the link comes up (the LED does not prove the radio, step 28). The telemetry must have run with no drop-outs.
- If the lid has eased, the fix is a stiffer hook or more preload in
tools/make_radio_cradle.pyand a reprint of the lid. Never glue it.
| Doublet at 21 m/s EAS | Ratio if the authority is the CFD’s | Ratio if the authority is VSPAERO’s |
|---|---|---|
| Roll, peak roll rate per µs of differential elevon | 0.87 deg/s per µs (SITL 0.87 at 21.0 m/s on the 2.680 kg nose-package model, run np-gains, 2026-10-05; 0.87 at 21.0, 0.82 at 19.9 and 0.91 at 22.1 on the 2.724 kg model with the earlier nose, the same day, run fb-gains; 0.88 and 0.90 to 0.92 on the 2.681 kg model the same day; JSBSim 0.86 to 0.90, 2026-10-01, not re-flown) | 1.13 deg/s per µs |
| Pitch, peak pitch rate per µs of elevon | 0.53 deg/s per µs (SITL 0.528 at 21.1 m/s on the 2.680 kg nose-package model, run np-gains, 2026-10-05; 0.535 at 21.1, 0.534 at 20.0 and 0.564 at 22.2 on the 2.724 kg model with the earlier nose, the same day, run fb-gains; 0.535 to 0.541 at 21.2 on the 2.681 kg model the same day; it was 0.47 on 2026-10-01, when the pitch doublet fired at 20.53 m/s and c_m_deltae was 4.9% lower) | 0.63 deg/s per µs |
The CFD column (Clda 0.207) is measured from the H5 doublets on the current model. The
doublets flew in SITL on the 2.724 kg first-build model at 20, 21 and 22 m/s EAS (2026-10-05, run
fb-gains), on the 2.681 kg model at 21 and 22 (the same day, run h5-main, eight logs) and on the
JSBSim port at the same speeds on the 2.59 kg model (2026-10-01). On the first-build model the peak
roll rate is 19.7 to 21.9 deg/s for 24 µs and the peak pitch rate 27.0 to 28.2 deg/s for 48 to 51 µs
(on the 2.681 kg model 21.0 to 22.2 and 25.7 to 27.0; on 2026-10-01, 20.4 to 22.1 and 22.4 to 24.3).
The first-build model’s pitch terms (c_m_deltae, c_m_q, c_m_a) are all 7.8% larger than the
2.681 kg model’s, for the smaller pitch inertia, and the ratio did not move: the doublet’s quarter
second is long against the pitch damping time, so the peak rate is the quasi-steady rate set by
c_m_deltae over c_m_q, which the common factor cancels. The retune bases are 0.801 (pitch, step 60)
and 0.311 (roll). The VSPAERO column is the port’s result at
21 m/s on the model before 1bcc0b1. That result is 27.1 deg/s of roll rate for 24 µs. Both
columns are estimates.
The rates scale with airspeed, not airspeed squared: the moment goes with the square, but the rate settles where the damping, which goes with the speed, balances it (th-aeronautics, 2026-10-05: from 21 to 22 m/s the SITL roll rate rose 4.7% and the pitch rate 3.9% for 5.0% of speed). At 19 m/s expect 90% of the table. At 23 m/s expect 110%. The 21 to 22 m/s data supports this first-order rule; nothing outside that range does.
The night build
Section titled “The night build”The night-lights build (Ryan, 2026-10-06: the strobes and position lights, and the Roaring Top 1300
lighting battery as a third pack; on Fuselage C about 3,198 g, cg.md) flies this card with
these steps added. It flies the common file’s AIRSPEED_STALL 20.0, as the day build does:
params/payload-lights.parm no longer sets it (th-avionics 5a357f69). The side ports read low near
the stall, so 20.0 indicated sits far above Fuselage C’s indicated stall, about 14.3 m/s at the
night mass (th-aeronautics, estimate). On the night SITL model (c24b-w78-night, three flights a row, th-testpilot
ecca13b7) there was no assist and no time at or above 9.5 degrees of true angle of attack in the
survey turns, the lane landing and the transition did not change, and the calm survey used 3.0%
less energy than at the earlier 20.6. That 20.6 came from the earlier wing’s soft band
(jbsim-b3, 19.70 to 19.81 m/s, plus a 0.75 m/s buffer) and does not apply to Fuselage C.
- Load
params/payload-lights.parmafter the airframe file, then reboot the board with CAN on. Runtools/check_params.pyagain. - Copy
sim/scripts/lights.luatoAPM/scriptson the board’s card. Leave the CG slider’s thresholds at their day values (th-avionics, th-aeronautics, 2026-10-06: the night values of 20.0, 20.3 and 20.5 sat inside the survey’s gust band and made the pack shuttle 8 to 18 times a survey in SITL; v1.6’s cap at the 270 mm limit makes them unnecessary). - For a night flight set
LGT_NIGHT1. At boot, make sure that both load messages appear: “lights … loaded” from the flight controller and “lights node script … loaded” from the node (the version number in each changes with the script; the log keeps it). - Make sure that the GCS shows the lighting battery as BATT3 at 8.2 V or more (about 95 %):
with
LGT_NIGHT1 the script sets the night arming floor,LGT_ARM_V8.2 V, while the aircraft is disarmed, and puts the day floor (BATT3_ARM_VOLT7.8) back by day, so the board does not arm at night under 8.2 V (th-avionics 73bf93a). Charge the lighting battery full before a night flight: the longest night flight, about 43 min (the flight pack runs out first), takes about 43 % of the 1300 mAh pack with the keel strobes at 2.2 A, so from 95 % the lighting battery is near 53 % when the flight pack triggers its return (th-aeronautics, estimates; th-avionics 75ed622). A pre-arm failure that names BATT3 is this. A “Battery 3 unhealthy” pre-arm with “lights: no 6S at the node: 6S pigtail unplugged or fuse F1 open? not armable” is not the lighting battery. Plug in the node’s 6S pigtail. If it is already plugged in, check the node’s fuse F1 (th-avionics d8f8e37, 75ed622, 7dacf19e). The aircraft returns at night under 40 % of the lighting battery (LGT_LOW_PCT). - Arm. Make sure that the top strobe and the keel strobes flash alternately (two strobe channels: the top dome on one, all the keel LEDs on the other; th-avionics 7208d36, the belly strobe in the keels, Ryan 2026-10-11) and that the position lights are on. Disarm.
Source: docs/first-flight.md in the repo. Edit it there; this page is generated.
Comments
Comment on the whole page here, or on one section or step with the button beside it.